Clone from your repository, importing your database and setting up to go live
Creating a new vanilla Magento 2.3 instance in AWS LightSail is pretty easy and straightforward, with just a few clicks you can have your Magento 2 shop up and running, but deploying your already made Magento 2 from your repository, importing your database and setting it up on the other hand might give you a bit of small troubles.
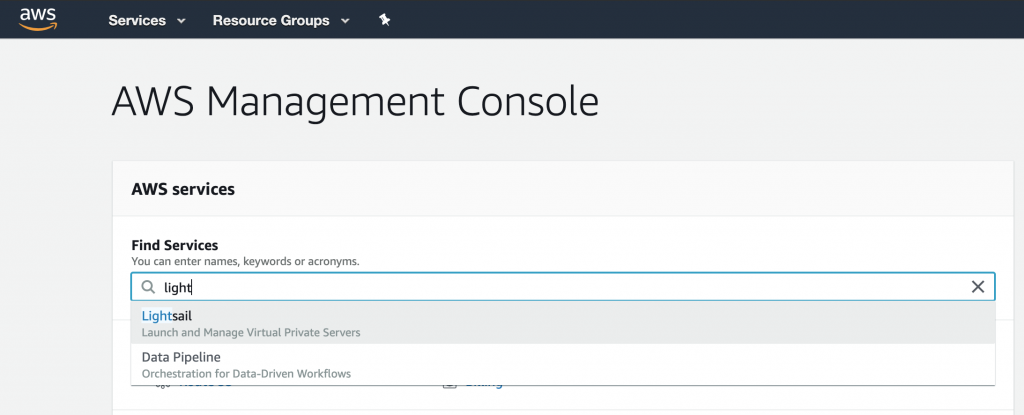
Part I. Setup the AWS LightSail instance

Create or log into your AWS account.
Tip: seems you can’t log into your account? if your account email was at some point added to an IAM account (Amazon Identity and Access Management), take care to just enter your email address, and not your IAM username. The login form is very confusing.
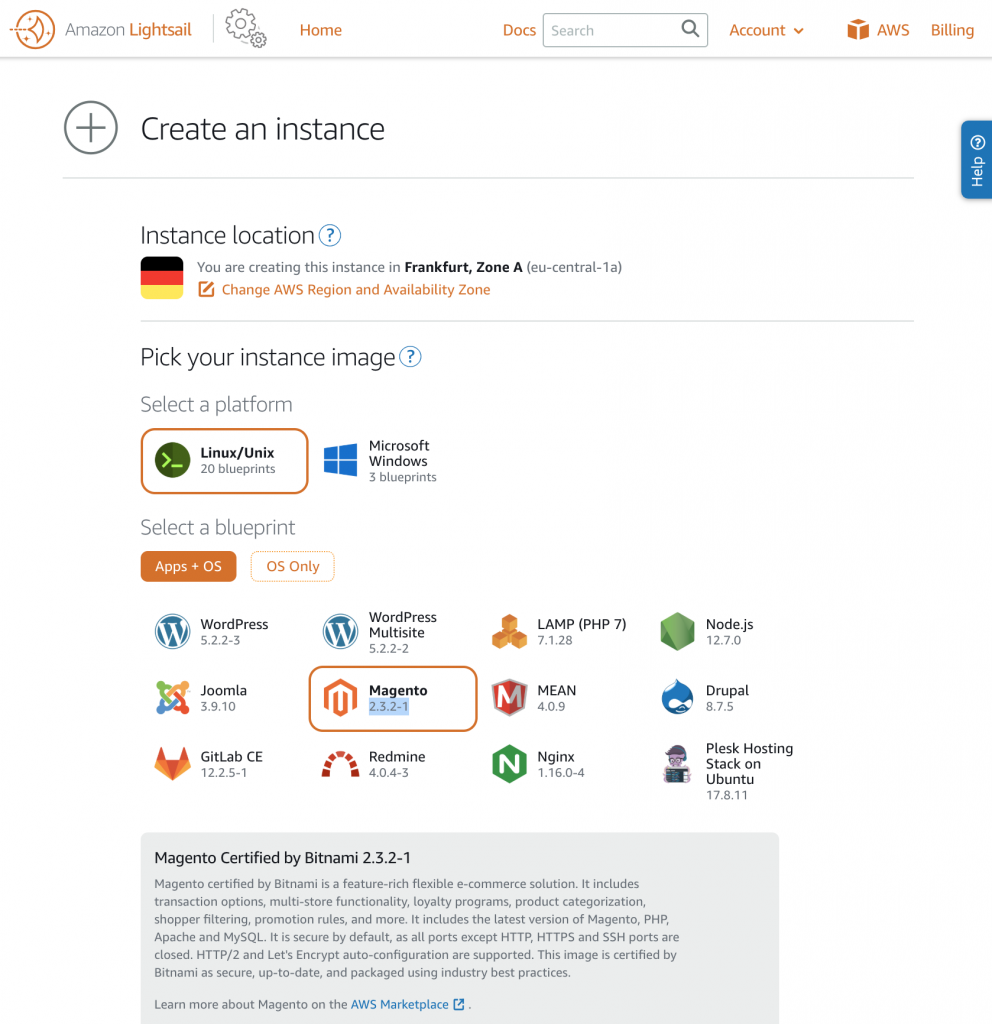
Create a new LightSail instance
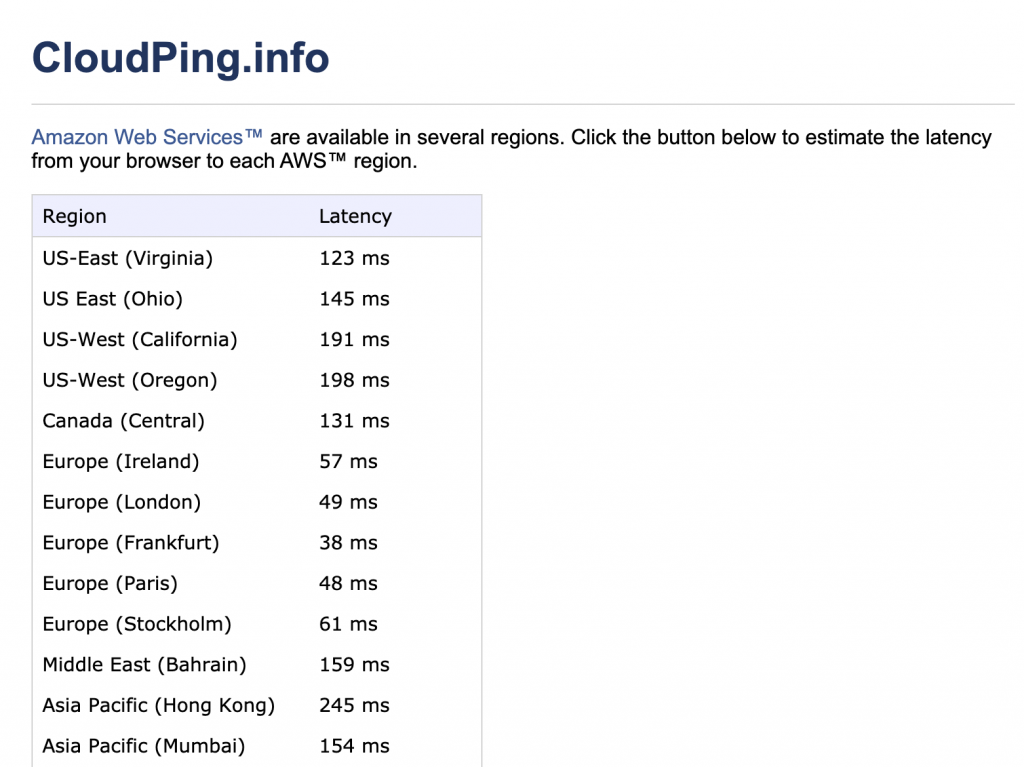
First thing is to choose your instance location. You can easily determine which is best suited by checking ping times from your current location to all AWS regions, using this tool: https://www.cloudping.info/, which estimates the latency from your browser to each AWS region.
Then you have the option to generate or add your SSH key that you will use to connect to your instance.
Next step is to choose an instance plan. I would recommend going for the 2GB memory plan, if you plan to use the web setup wizard / have a large products catalog, or check the detailed Magento 2.3 hardware requirements documentation.
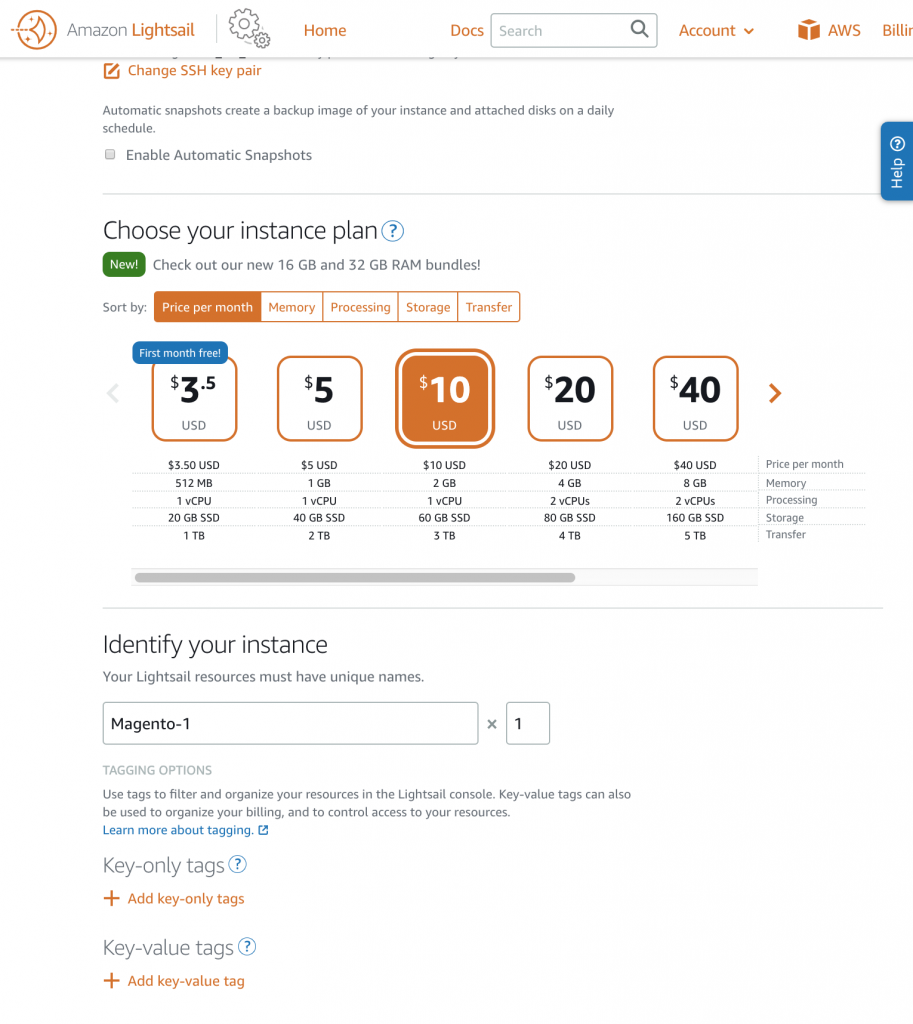
Be aware that if you want to scale down later, you’ll have to migrate your instance content manually. If you’ll need to scale up, you can do that easier by creating an instance from a snapshot.
In few minutes after hitting Create instance, it will be up and running. You can conect via ssh from your terminal by ssh (make sure to specify your key or have it added to your ssh-agent) with the provided username (bitnami) @ provided-ip.
ssh-add ~/.ssh/the_id_rsa_key_added_to_instance
ssh bitnami@1.2.3.4
You can even connect securely using your browser window terminal that AWS offers, by just clicking the Connect using SSH button.
Give your instance a static IP address
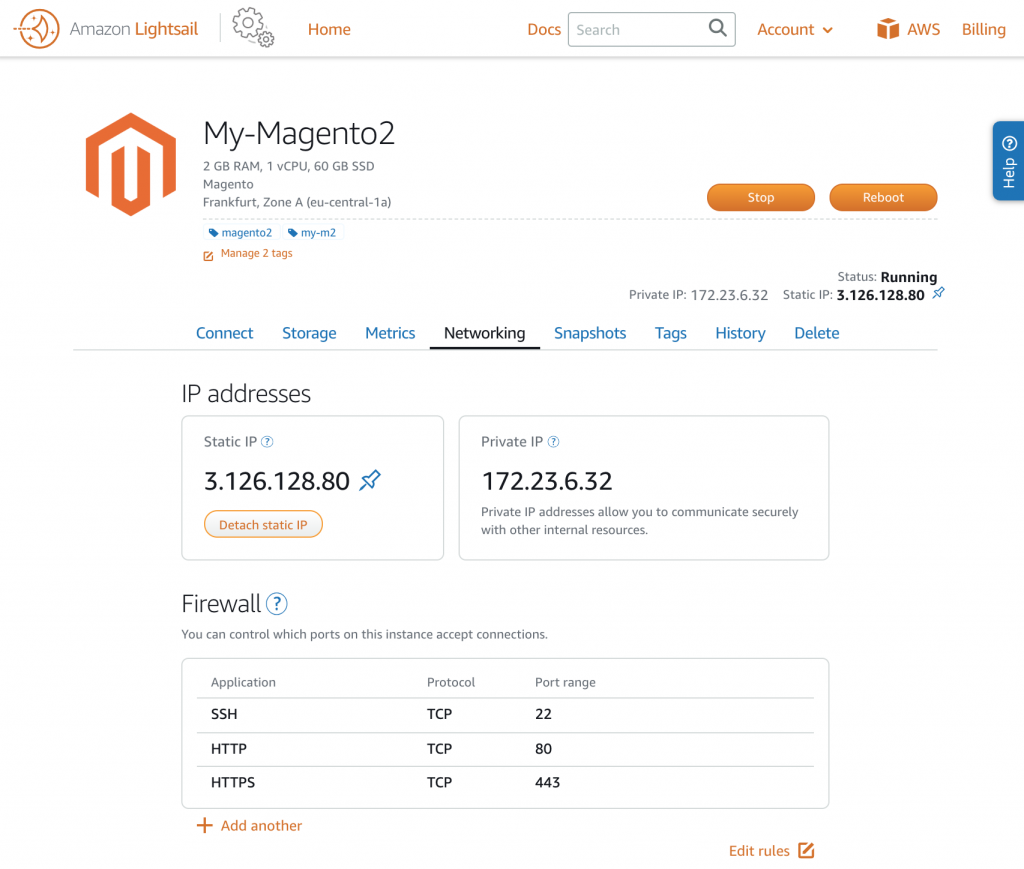
If you plan to use this instance in production, don’t rush to connect yet, let’s give your instance a static IP, as the initially given IP can change at first reboot. Go to the Networking tab and click Create a static IP to create a static ip address and assign it to your instance. You can manage up to 5 static ip addresses for free.
First impression
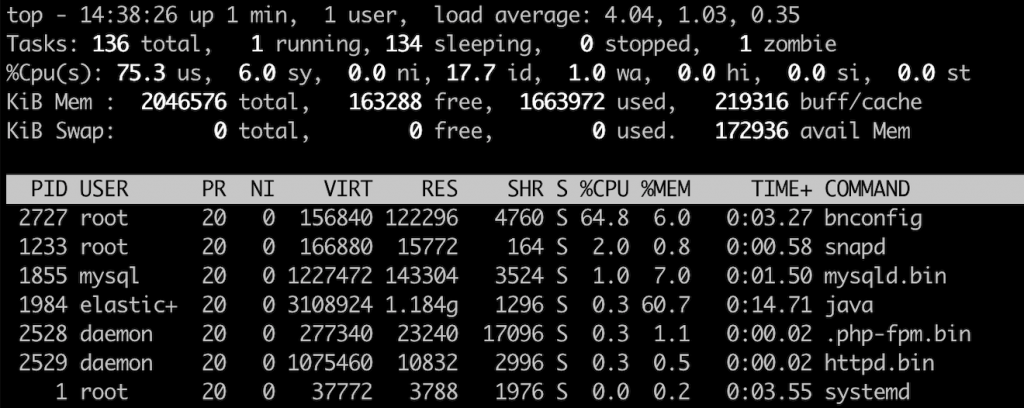
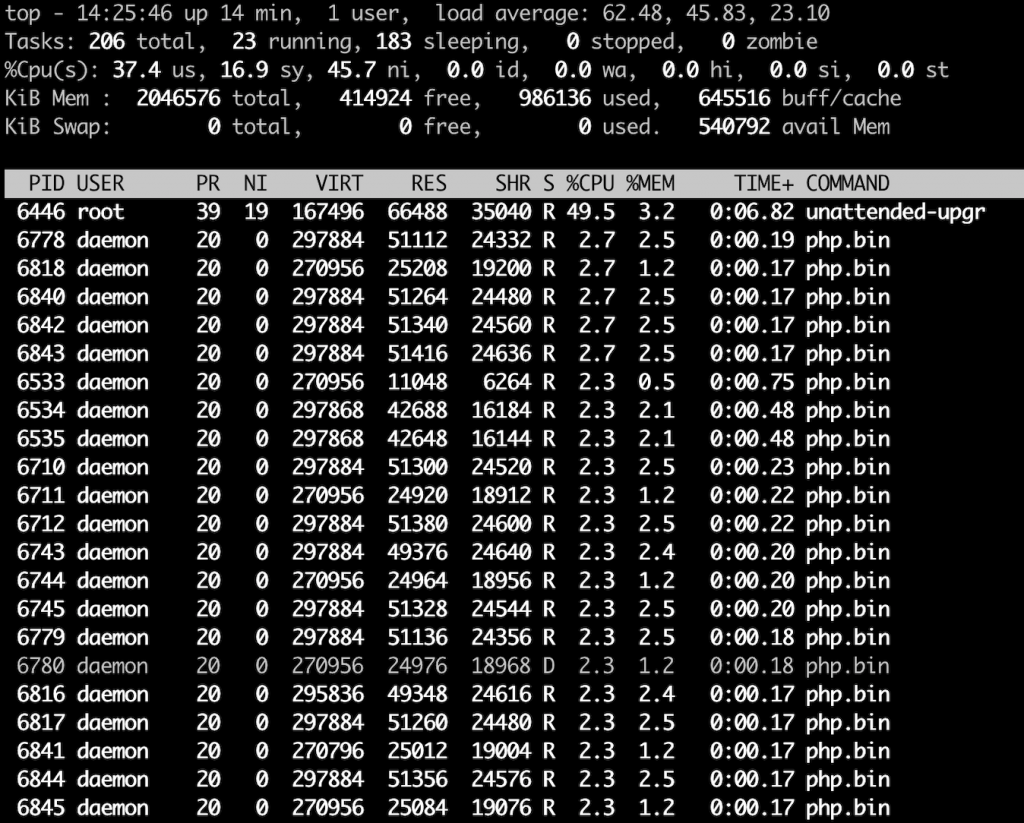
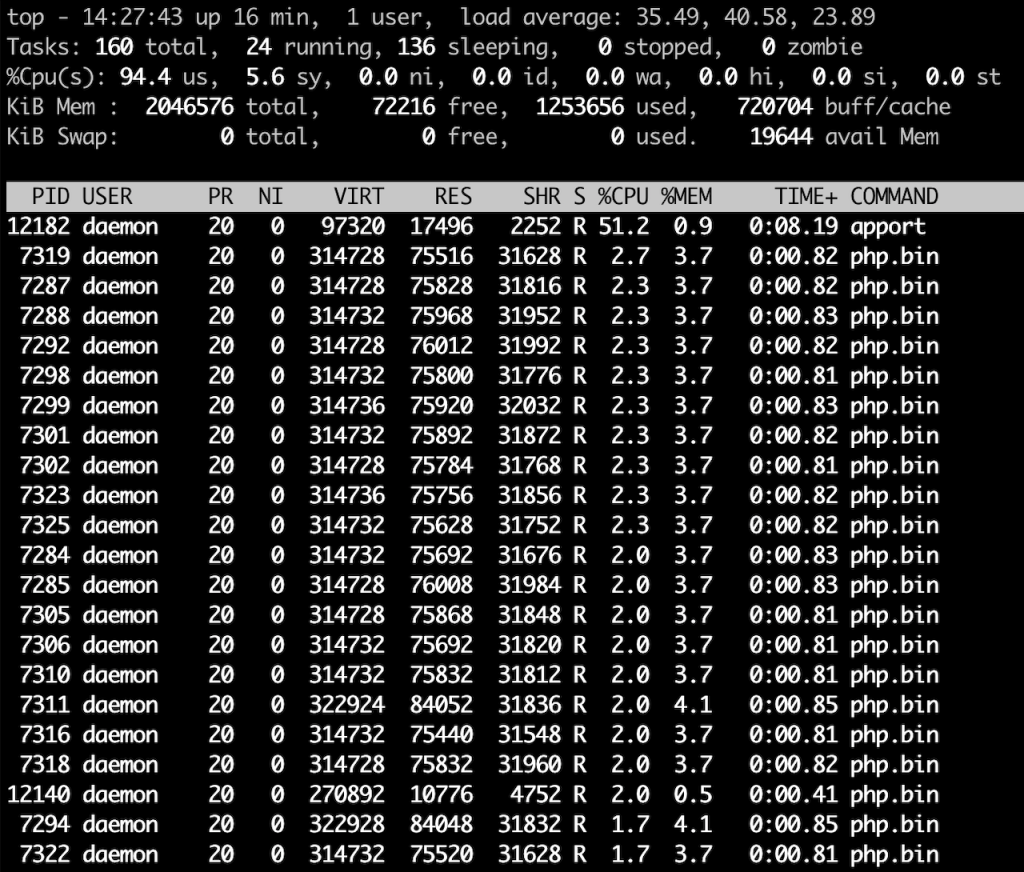
After you first connect to the instance, you might notice degraded performance, and your terminal might become sluggish to the point you cannot even type in it. I’ve encountered this performance issue during the first hour of operation and an instance reboot was not helpful. The metrics graphics was not revealing a such big hit, nothing more than 60% cpu, but top command in console revealed there were a lot of php processes, and another few processes which were taking most of the cpu: apport, unattended-upgr, bnconfig.
Part II. Deploying your Magento 2 instance
# Make the htdocs folder empty so you can clone your repo into it
# Move content to another folder, as it will be helpful to be able to reference the app/etc/env.php later
mkdir /opt/bitnami/apps/magento/htdocsbak
sudo mv /opt/bitnami/apps/magento/htdocs/* /opt/bitnami/apps/magento/htdocsbak
# also move the .files
sudo mv /opt/bitnami/apps/magento/htdocs/.* /opt/bitnami/apps/magento/htdocsbak
# make sure the folder is empty
ll /opt/bitnami/apps/magento/htdocs/

cd /opt/bitnami/apps/magento/htdocs/

# Clone your repository
git clone git@bitbucket.org:youraccount/yourrepository.git .

# If your git pull operations fail because of folder permissions
# you can sudo preserving env vars to preserve the ssh key forwarding
sudo -E -s
# then execute your git operations without permissions issues
# Instead of this, I initially did: sudo chown -R bitnami:daemon /opt/bitnami/apps/magento/htdocs
# then fixed ownership later: sudo chown -R daemon:daemon /opt/bitnami/apps/magento/htdocs/
# and sudo /opt/bitnami/ctlscript restart

# Copy the env.php file from the backup made earlier
# since you probably have not versioned your env.php file
cp /opt/bitnami/apps/magento/htdocsbak/app/etc/env.php /opt/bitnami/apps/magento/htdocs/app/etc/env.php

# Make necessary adjustments, at least adjust your crypt key, so your saved accounts have a chance to work
edit app/etc/env.php

# Don't forget composer install :)
composer install

# Fix permissions
# since my instance was missing /opt/bitnami/apps/magento/scripts/fixPermissions.sh
sudo find /opt/bitnami/apps/magento/htdocs -type d -exec chmod 755 {} \;
sudo find /opt/bitnami/apps/magento/htdocs -type f -exec chmod 644 {} \;
sudo find /opt/bitnami/apps/magento/htdocs/mage -type f -exec chmod 755 {} \;
sudo find /opt/bitnami/apps/magento/htdocs/media/ -type f -exec chmod 664 {} \;
sudo find /opt/bitnami/apps/magento/htdocs/var/ -type d -exec chmod 775 {} \;
sudo find /opt/bitnami/apps/magento/htdocs/var/ -type f -exec chmod 664 {} \;
sudo find /opt/bitnami/apps/magento/htdocs/app/etc/ -type d -exec chmod 775 {} \;
sudo find /opt/bitnami/apps/magento/htdocs/app/etc/ -type f -exec chmod 664 {} \;

# Fix ownership
sudo chown -R daemon:daemon /opt/bitnami/apps/magento/htdocs/
# Find your bitnami user password, so you can connect to mysql
cat ~/bitnami_credentials
cat ~/bitnami_application_password
# both above ^ passwords were the same
mysql -u root -pobtainedpassword

# You can also connect your sql client via ssh
# You can use bitnami user and password, or the magento db user and password from the backed env.php file

# Depending on the env you populated your db accounts, you might have issues with stored passwords
# I only had an admin account for which I changed the email and created a new one


# Bitnami instance was containing a magento-cli script in bin folder
# My instance was not having it, so I copied it over from the backup folder
# It basically runs bin/magento command using the web servers' user and group
cp /opt/bitnami/apps/magento/htdocsbak/bin/magento-cli /opt/bitnami/apps/magento/htdocs/bin/

# Load the Bitnami environment, you can cat the file to see what it does exactly
sudo /opt/bitnami/use_magento

# Change deploy mode if needed
./bin/magento-cli deploy:mode:set developer
./bin/magento-cli cache:flush
./bin/magento-cli deploy:mode:set production

# Other handy commands to not forget in case of trouble
sudo /opt/bitnami/ctlscript.sh restart varnish
rm -rf var/cache/*
rm -rf generation/*

# Disable bitnami banner from bottom left
# You can still reference the linked page later, by going to http://yourip/bitnami/index.html
sudo /opt/bitnami/apps/magento/bnconfig --disable_banner 1
sudo /opt/bitnami/ctlscript.sh restart apache
Connecting to database
If you are on macOS and use Sequel Pro, be aware that currently Sequel Pro does not support MySQL 8, and generates an error that can cause you to think your connection failed because of your credentials:
NSInvalidArgumentException - [_NSInlineData isEqualToString:]: unrecognized selector sent to instance 0x6000003d9955This is still an open issue for SequelPro since Feb 2017: https://github.com/sequelpro/sequelpro/issues/2699
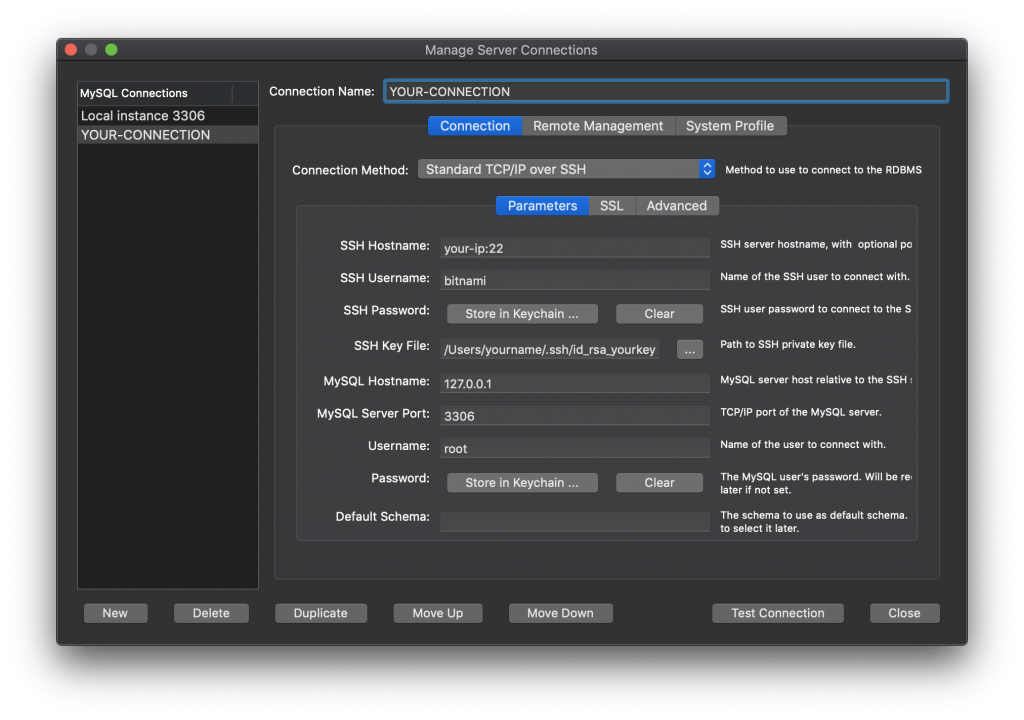
I used MySQLWorkbench to successfully connect via SSH, without needing to do this: https://community.bitnami.com/t/aws-wordpress-install-cannot-connect-to-mysql-via-sequel-pro-and-ssh/61590/3 to allow remote connections.
Troubleshooting
Website shows 503 backend fetch failed

https://community.bitnami.com/t/error-503-backend-fetch-failed-backend-fetch-failed/55496/8
# Website shows 503 backend fetch failed
# Turns out the owner was the issue, so:
sudo chown -R daemon:daemon /opt/bitnami/apps/magento/htdocs/
sudo /opt/bitnami/ctlscript restart
Other helpful links and references used:
- https://community.bitnami.com/t/modify-docroot-to-improve-security-in-magento-2-3/69670/6
- https://docs.bitnami.com/aws/faq/get-started/access-ssh-tunnel/
- https://community.bitnami.com/t/bitbucket-not-setting-up-permission-denied-error/48472/9 – On this one, be aware that in the latest bitnami images, correct owner is daemon:daemon instead of bitnami:daemon.
- https://docs.bitnami.com/general/how-to/understand-bnsupport/
- https://docs.bitnami.com/installer/apps/magento/administration/upgrade/
- https://docs.bitnami.com/aws/apps/magento/configuration/change-magento-mode/

